Tuesday, December 31, 2013

B a c k T o B l o g g i n g


Hey Everyone! I'm finally getting back in the blogging mood after getting through finals and enjoying some time relaxing with family and friends over the holidays. 
I can't believe I've already been working on this blog for two years! It has been a great learning experience for me and I enjoy being able to catalogue moments and projects through this platform. 
So, there will be lots of updates and projects coming soon! 

Sunday, December 22, 2013

F o o d i e : P e p p e r m i n t M o c h a C r e a m e r


Peppermint mochas are definitely one of my favorite sweet coffee drinks (even winning out over pumpkin spice lattes). I wanted to make them at home so I decided to make my own pumpkin spice creamer! Here's how to make your own:

You'll need 2 cups of milk base (I used 1c half and half and 1 c milk but you can use any milk base you'd like! Even almond milk would work.) Pour this in a small saucepan, add 3 tablespoons of high quality unsweetened cocoa powder and 1/4 c of sugar. Whisk this and heat over medium until steaming and sugar is dissolved.  Remove from heat and add 1 teaspoon vanilla extract and 1 teaspoon peppermint extract. I store my creamer in a mason jar in the fridge. 
Add a few tablespoons to your coffee and enjoy! If you're feeling extra indulgent, top with whipped cream and sprinkles :)

Friday, December 13, 2013

H a p p y F r i d a y !


Happy Friday, friends! 

This is definitely a happy Friday, for me, as I just finished up another semester of grad school!
Now, I can finally concentrate on what really matters this time of year; family, friends, Christmas and craft projects! ;)

Thursday, December 12, 2013

F o o d i e : J a m a r e t t i C o o k i e s


I tested out a new cookie recipe over Thanksgiving break and these were definitely a hit!
Martha Stewart does it once again...

I followed the recipe pretty much exactly except I added a little extra almond paste just because I didn't want leftovers. I also used more jam on top of the cookies than the recipe called for. 
I really love this recipe and will be making these again as part of my Christmas cookie baking. So if you can't decide between jam thumbprints, amaretti cookies, or biscotti give these a try! It's like the best of all three!
Happy baking!

Wednesday, December 11, 2013

C r a f t B r e a k : W o o d e n B o x R e v a m p


Here is a great last minute DIY gift idea!

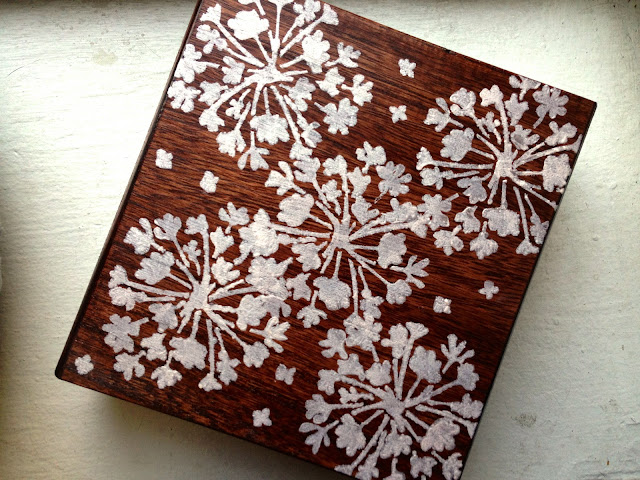
Purchase a simple wooden box from any craft store, take off any hinges, apply wood stain (this is really where the magic happens - it's surprising how great a $3 wooden box can look with some wood stain) allow this to dry and use acrylic paint to add any additional design you want! I used a stencil and some pearl colored paint to add the floral pattern to my box. Coat the box with a thin clear coat to finish (I recommend not adding clear coat on surfaces where the lid and rest of the box connect to avoid any sticking) reattach any hinges and you're done! I filled my box with a hand painted card/stationary set and gave this to my grandma as a birthday gift. 
Happy gifting! 

Tuesday, December 10, 2013

C r a f t B r e a k : F e l t B a g


This little bag makes a great gift or works as the perfect holder for a special piece of jewelry or other little trinkets.

To make: Cut out two matching felt rectangles  - size is up to you, just allow for about an extra inch in the height. Embroider/appliqué on your design to one of the rectangles. Fold over about an inch on the top of one of the rectangles and sew across (this creates the space to thread through the ribbon or rope) Repeat this on the other rectangle. Then lay the rectangles on top of each other (right side facing out) and sew around the edge leaving the tubes open on the sides. You should be left with two tubes at the top where you can thread your ribbon or rope through to close the bag. 
And that's it! I really love how you can customize this little bag to really make it special for the person receiving it.

Tuesday, December 3, 2013

F o o d i e : C r e m e B r û l é e C h e e s e c a k e


This Thanksgiving I decided to try out a new dessert and opted for a vanilla bean creme brûlée cheese cake instead of a more traditional Thanksgiving dessert. For my first attempt at making cheesecake I surprised myself with how well it turned out! My family sure seemed to enjoy it too. (Just ignore that big crack in the middle - good thing it doesn't affect the flavor!)

I followed the recipe here and opted to make a brûlée top instead of a chocolate top. I also substituted German butter cookies (Leibniz Butter Kekse) for graham crackers. 

I think the only change I would make would be to cool this down more slowly by allowing it to cool in the oven rather than on the counter. I think this would help reduce the chance for cracks. 

This cheesecake turned out so creamy and rich and the topping can be very versatile. I will definitely be making it again!